Skip to main content
Setup the FTP Server
- VuVault Cameras require an FTP server that allows insecure plain FTP connections by default. For FileZilla Server, this is version 0.9.60. On the VuVault server, download FileZilla Server 0.9.60.
- Run the FileZilla Server installer clicking Next to use the defaults then click Install.
- When the installer is finished, click Close.
- When the install finishes, click Connect.
- On the top menu bar, click Edit then click Settings.
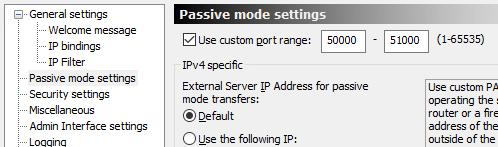
- On the left-hand tree menu, click Passive Mode Settings.
- On the Passive Mode Settings screen, check the Use Custom Port Range checkbox and set the port range to 50000 - 51000.
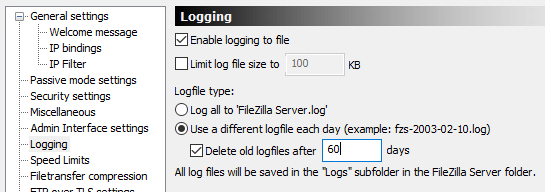
- On the left-hand tree menu, click Logging.
- On the Logging screen, check the Enable Logging to File checkbox.
- Under the Logfile Type setting, select Use a Different Logfile each day.
- Check the Delete old logfiles checkbox and enter 60 into the textbox.

- Click Ok to save the settings.
- On the top menu bar, click Edit then click Users.
- Click Add to create a new FTP user.
- When prompted, enter the username that was chosen while setting up WTM Lite then click Ok.
- Check the Password checkbox and enter the password that was chosen while setting up WTM Lite into the textbox.
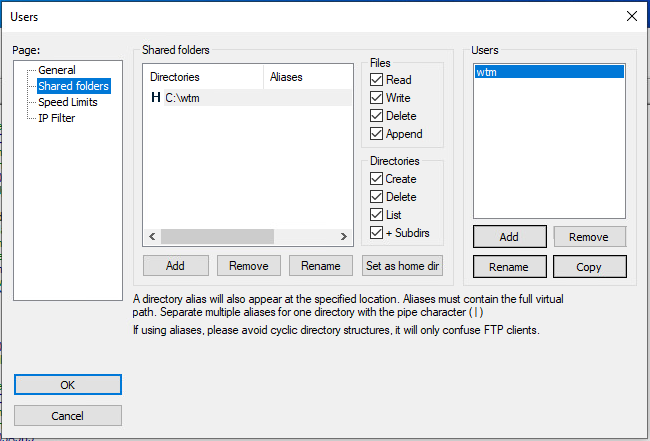
- On the left-hand tree menu, click Shared Folders.

-
Click Add.
- When the Browse window opens, expand the Local Disk (C:) and select the WTM folder then click Ok.
- Select the C:\WTM folder from the directory list.
- Under the Files group, check the Read, Write, Delete, and Append checkboxes.
- Under the Directories group, check the Create, Delete, List, and + Subdirs checkboxes.
- Click the Set as home dir button then click the OK button.
- Open the Windows Defender Firewall with Advanced Features.
- Click the Start button and type Windows Defender Firewall.
- Click Windows Defender Firewall with Advanced Security when it appears.
- On the left-hand tree menu, click Inbound Rules.
- On the right-hand action pane, click New Rule...
- Select Port, then click Next.
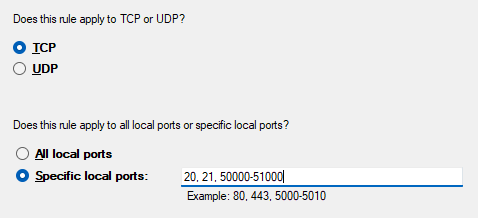
- Select TCP, then click Specific Local Ports.
- In the Ports textbox, enter 20, 21, 50000-51000 then click Next.
- Select Allow the Connection then click Next.
- Leave all 3 network locations checked then click Next.
- Under Name, enter FileZilla Server Inbound Ports, then click Finish.
- On the left-hand tree menu, click Outbound Rules.
- On the right-hand action pane, click New Rule...
- Select Port, then click Next.
- Select TCP, then click Specific Local Ports.
- In the Ports textbox, enter 20, 21, 50000-51000 then click Next.
- Select Allow the Connection then click Next.
- Leave all 3 network locations checked then click Next.
- Under Name, enter FileZilla Server Outbound Ports, then click Finish.
- The FTP will now be accessible from the local network.


No Comments