Import PST Data Files into Exchange Online
Uploading data to the Consumer and Enterprise Exchange Online is free, however a charge will be accrued, if you are uploading to a GCC Exchange Online.
Assigning the Mailbox Import Export Permissions
It can take up to 24 hours for the permissions to propagate down to the users.
- Open the Exchange Admin Panel.
- On the left-hand navigation pane, click Roles then click Admin Roles.
- Click the Add Role Group button.
- Enter a name for the Role Group, then click Next.
- Under permissions, find and select the Mailbox Import Export permission.
- Click Next.
- Add a user to manage the role group then click Next.
- Verify that all the information is correct, then click Finish.
Importing into a Consumer/Enterprise Account
The account must have the Mailbox Import Export permissions before Import Requests can be created.
Importing into a GCC Account
The account must have the Mailbox Import Export permissions before Import Requests can be created.
Prerequisites
- Download and install Azure Storage Explorer.
- Download and extract the Azure AZCopy Tool.
- Create an Azure GCC Subscription.
- Install the Exchange Online PowerShell Modules.
Create the Storage Blob
- Open the Microsoft Azure homepage and click Storage Accounts.
- Click Create.
- Fill out the form then click Review + Create.
- If there are no errors, click the Create button.
Retrieve the SAS Key
- From the Azure homepage, click Storage accounts.
- Click the storage account you created above.
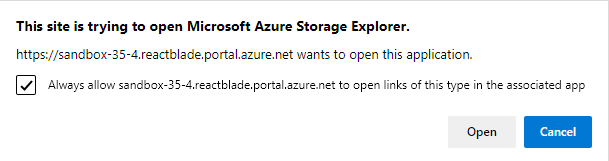
- Click Storage Browser on the left-hand side, then click Open Azure Storage Explorer at the bottom of the page.
- When prompted, click the Always Allow Checkbox, then click Open.

- Wait for Azure Storage Explorer to open. Click Select on the Account banner and log in if prompted.

- Select your Azure subscription from the left-hand Account Management pane.
- Click Open Explorer.
- Under your Azure Subscription, double-click Storage Accounts.
- Double-click the storage account you created for importing Exchange PST files.
- Right-click Blob Containers, then click Create Blob Container.

- Enter a name for the Blob Container, then press Enter. The name must be all lowercase with no spaces, In this tutorial, pst is used.
- Right-click the Blob Container you just created, then click Get Shared Access Signature.
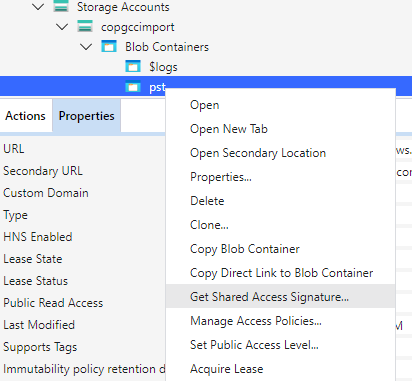
- For uploading, select all the permissions, then click Create.
- Copy the Connection URL for use later.


Upload the PST Files using AzCopy
- Copy the AzCopy Tool to the directory that contains your Exchange PST files.
- Open a Command Prompt or PowerShell window and navigate to the directory that contains your Exchange PST files.
- Enter the following command: azcopy.exe copy "location-of-pst" "connection-url"
- Replace location-of-pst with the full file path to your Exchange PST files.
- Replace the connection-url with the SAS (Shared Access Signature) URL from the steps above.
- Press Enter and let the command process.
Create the Mail Import Request
- Open PowerShell.
- Run the Connect-ExchangeOnline command then login with an Exchange Online Account that has Mail Import Export permissions.
- Enter the following command then press Enter: New-MailboxImportRequest -Name "import-name" -Mailbox user@example.com -AzureBlobStorageAccountUri "url-of-pst-blob" -AzureAccessSignatureToken "token" -TargetRootFolder "/"
- Replace import-name with a unique Mailbox Import name.
- Replace user@example.com with an appropriate username.
- Replace url-of-pst-blob with the URL to the user's PST on the Azure Storage Blob. Example: https://myazureblob.blob.core.windows.net/pst-files/user.inbox.pst
- Replace token with the Shared Access Token of the Azure Storage Blob containing the PST files.
- If the command was run successfully, a queued file report will be shown.
- You can check the status of the Mailbox Import by running the Get-MailboxImportRequest command.
No Comments